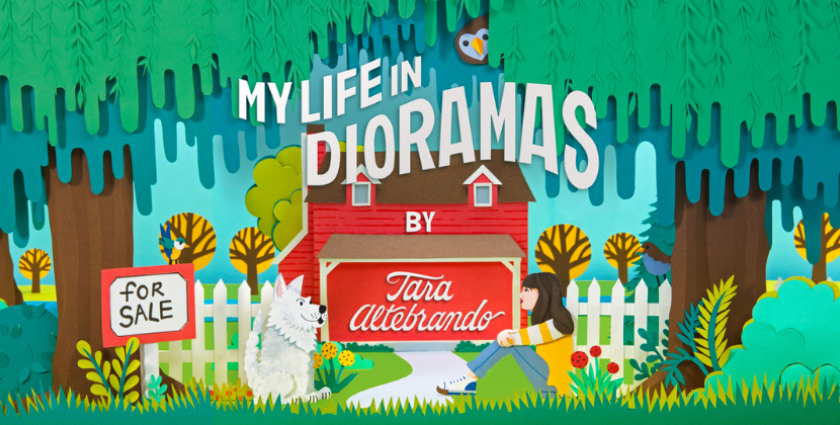
Not all show art is created equal. The Pinna Original audiobook, My Life in Dioramas by Tara Altebrando, takes us through the journey of a 12-year girl, Kate, whose family is moving out of her childhood home. Kate decides to create dioramas to preserve her memories of growing up in the house she knows and loves, Big Red.
It was important to the Pinna marketing team to have the artwork be reflective of the story and enlisted a fantastic artist, Helen Musselwhite, to create a real diorama and photograph to be used as the show art. We were lucky enough to have Helen document the process and share her unique approach with us - and now with our listeners!
Creating the artwork for My Life in Dioramas told by Helen Musselwhite
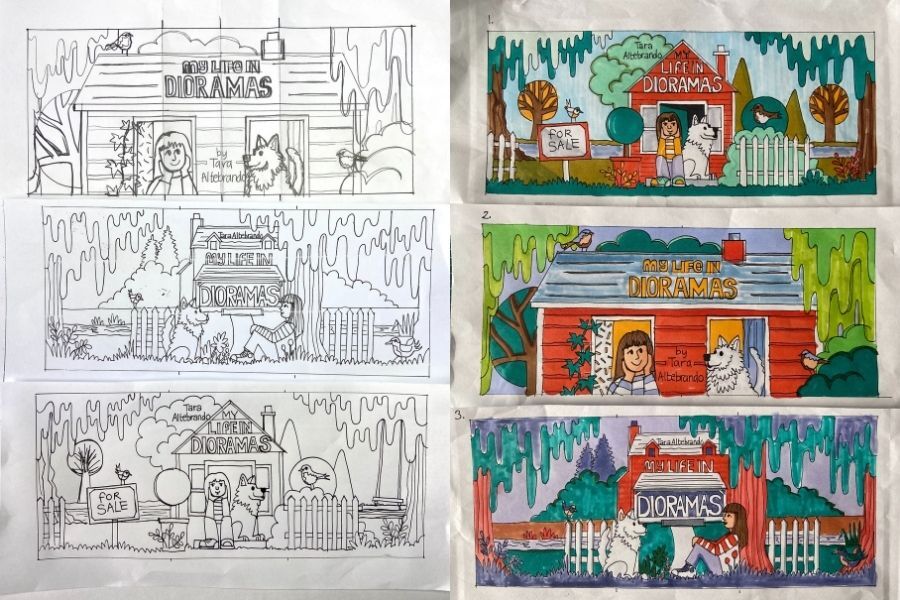
Step 1 - Concepting
I started this project as I always do, with some very quick thumbnail sketches and notes outlining my plan. I also jotted down some keywords and themes that were highlighted in the creative brief from Pinna to be sure I captured the essence of the book as best as possible.
I narrowed it down to 3 of my favorite sketches, the ones I felt fit the brief best, and worked them up into more detailed drawings. This is where I start to think about how many layers the diorama will have, a color palette, and which types of paper to use.
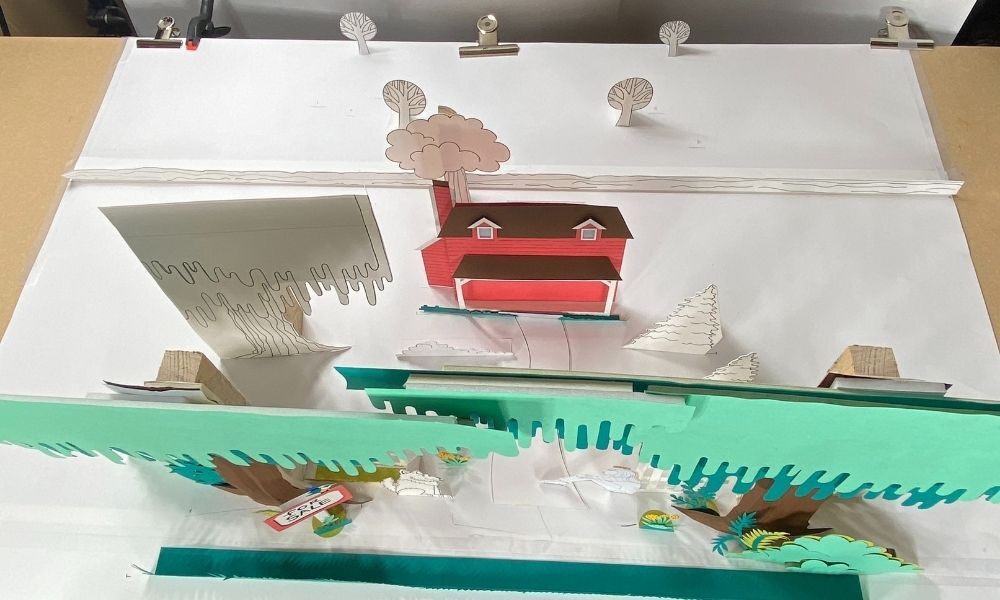
Step 2 - Mock-up
Once a concept was chosen, I created a full size black and white mock up and took some photos of it to check that the design fit the dimensions and that all the elements are the correct size in relation to each other.
- It’s important to remember that when I take my sketches from 1 dimension into 3 dimensions, things change a bit, so now's a good time to double check the work before I start making the final diorama layers in colored paper.

Step 3 - Assembly
To make the final colored layers I first redraw each layer onto tracing paper then I transfer them onto colored paper by flipping the tracing paper so I’m tracing the lines again but in reverse.
- It’s also on the reverse side of the paper so there won’t be any pencil lines on the front of the layers.
It’s now time to cut all the elements out following my traced pencil lines and glue the details. I use a scalpel and small scissors to cut the paper and an all purpose white glue.
The diorama layers will be free standing, which means they need to be strong enough to remain upright. I help strengthen them by gluing foam boards to the back and sides as well as putting wood on the bottom with double-sided tape.
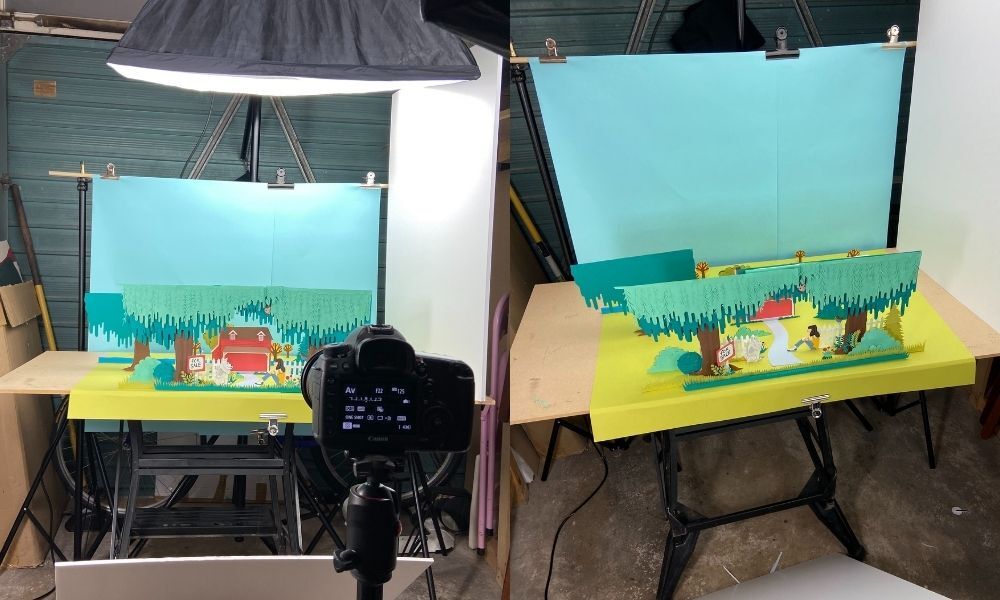
Step 4 - Get the picture!
When all the layers and elements are made, it’s time to photograph them for the final hi-resolution images that will be used on Pinna.
- I set up the scene checking that all the layers and elements are in the correct places constantly checking on the camera and moving elements to fit the scene (this is where the free standing layers really help as I have full flexibility to move things around).
- I use lights to bring the scene to life. By changing the direction and angle of the lights I can highlight areas and add even more depth to the scene.
- The lights help to pick up areas that I’ve folded and curved, i.e. the little leaves dangling down along the top of the front layer and the scored lines in the tree trunks.
- Finally it’s time to take the camera shots into Photoshop to retouch and crop to the specified sizes before sending through the final images
And just like that, you’ve made yourself a diorama!
Create your own diorama Activity Sheets
We’re all ears!
Find us on all our social platforms – Facebook, Instagram, Twitter, and Pinterest – or email us at contact@pinna.fm.